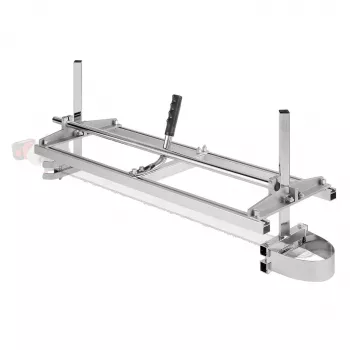
A portable chainsaw mill turns a standard chainsaw and bar into a compact slab-making setup for boards, beams, and live-edge cuts. The big advantage is mobility: instead of hauling heavy logs to a sawmill, the mill comes to the log—whether it’s in your yard after a storm, on a jobsite, or out on a remote property. With a mill that fits 14″–36″ bars and adjusts from roughly 0.2″ up to 11.81″ thick, you can move from thin boards to hefty timbers by changing the height setting and keeping your first reference cut straight.
Bar length compatibility is only the starting point. A mill rated for 14″–36″ bars can physically mount to that range, but the usable cutting width is limited by bar length and the mill’s frame clearance. If your typical logs are near the upper end of what you want to cut, leave a margin so the powerhead and mill hardware don’t become the limiting factor.
Adjustable thickness is what turns a “one-size slabber” into a practical milling tool. With an adjustment span of about 0.2″ to 11.81″, the same setup can produce thin boards for small projects, thicker stock that can later be planed flat, and heavy beams for structural or landscape use. The key is that accuracy depends less on the number on the scale and more on your reference face and rigidity.
| Target thickness | Typical use | Setup tip | Common pitfall |
|---|---|---|---|
| 0.75″–1.00″ | Boards for shelving, small projects | Use a very flat guide/rail for the first pass | Waves from pushing too fast or a dull chain |
| 1.5″–2.0″ | Tabletops after planing, general lumber | Leave extra for drying/planing (e.g., +1/8″–1/4″) | Warp surprises if stacked without stickers |
| 3″–4″ | Mantels, thick slabs, benches | Slow feed; confirm bar oiling is strong | Heat buildup and chain stretch |
| 6″–11.81″ | Beams, posts, specialty blocks | Consider shorter passes and log stability | Binding from log movement or internal stress |
The best milling results come from careful prep. Most “bad cuts” start before the saw ever touches wood.
Milling is sustained cutting—longer runs, more noise, and more fatigue than quick crosscuts. Use proper PPE and keep your work area controlled. For additional safety guidance, reference OSHA’s chainsaw safety resources and training recommendations from the USDA Forest Service.
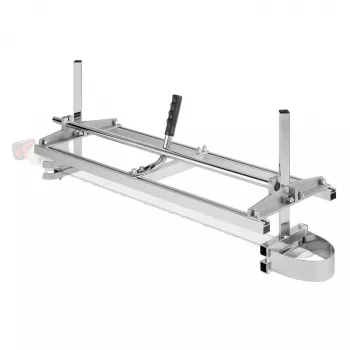
If you want a compact, adjustable option for making your own lumber where the trees are, the Portable Chainsaw Mill for 14″-36″ Bars, Adjustable Thickness 0.2″-11.81″ covers a wide bar range and a practical thickness span for everything from boards to heavy slabs. For the cleanest results, pair it with a sharp ripping chain, keep your guide rail straight on the first pass, and measure the thickness setting at both ends before each cut.
Choose a bar that comfortably exceeds the log’s intended slab width after accounting for the mill frame and powerhead clearance. Longer bars allow wider cuts, but they also demand more saw power and torque to avoid stalling and overheating.
Yes, but accuracy depends on a perfectly straight first guide cut, equal adjustment on both ends of the mill, a sharp ripping chain, and a slow, steady feed rate. It’s also smart to cut slightly over thickness to allow for drying movement and later planing.
A ripping chain (or a chain sharpened to ripping-style angles) is strongly recommended for smoother cuts, less vibration, and better efficiency than a standard crosscut chain. It also helps reduce chatter that can leave washboard texture on the slab.












Leave a comment