
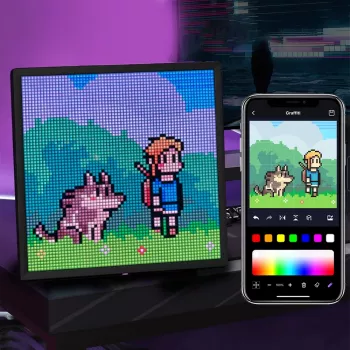
A 64×64 RGB LED matrix panel packs a lot of visual punch into a compact format: 4,096 pixels capable of bright color animation, scrolling text, dashboards, clocks, and reactive art. The key to a great result is treating it like a small “real-time display system”—you’ll need the right controller timing, stable 5V power, clean wiring, and a mounting approach that protects the panel long-term.
An LED matrix panel is a grid of pixels arranged in rows and columns; at 64×64, that’s 4,096 pixels total. Each pixel is made from red, green, and blue LEDs, and the panel blends those subpixels to create full color. Perceived brightness and smooth gradients depend heavily on how fast the panel is refreshed and how pulse-width modulation (PWM) is handled.
Most 64×64 panels use a multiplexed interface commonly referred to as HUB75. This means the panel does not “hold” an image on its own—your controller must continuously scan and refresh rows at high speed to keep the picture stable. Typical projects include scrolling signs, pixel art animations, information boards, music visualizers, and interactive installations.
Before picking a driver board or computing platform, confirm the panel’s interface and timing expectations. HUB75-style connectors are common, but scan mode and refresh requirements vary by panel batch and model.
| Option | Pixel count | Typical viewing distance | Why it’s chosen |
|---|---|---|---|
| 32×32 panel | 1,024 | Up close (desktop projects) | Lower power draw and simpler refresh needs |
| 64×32 panel | 2,048 | Near to mid-range | Wide layouts for text tickers and status boards |
| 64×64 panel | 4,096 | Mid-range (higher detail) | More detail for animations, dashboards, and pixel art |
| Chained panels | Varies | Signage distance | Build larger displays by tiling multiple panels |
Power is the difference between a crisp, stable display and a glitchy one. Plan around worst case: a full-white frame at high brightness is the peak load. Even if your real content is darker, a power supply that’s barely adequate can create flicker, random resets, and color shifts during bright transitions.
HUB75 panels are timing-sensitive, so choose a controller approach that matches your project goals.
Keep ribbon cables short, avoid sharp bends, and route them away from high-current power leads when possible. If chaining panels, confirm the controller supports the total resolution and the specific scan mode—performance depends on refresh rate and color depth.
For deeper technical references, see the Adafruit RGB Matrix Panels Guide and the widely used hzeller/rpi-rgb-led-matrix project (commonly used with Raspberry Pi setups). For general SBC setup and stability, the Raspberry Pi Documentation is a helpful baseline.
A clean-looking matrix display is a balancing act between brightness, refresh, and electrical noise control.
| Item | Price | Availability | Link |
|---|---|---|---|
| 64×64 RGB LED Matrix Panel | $35.67 | In stock | 64×64 RGB LED Matrix Panel |
| Wireless Rechargeable Bluetooth 5.1 Mouse for Apple Devices | $3.82 | In stock | Wireless Rechargeable Bluetooth 5.1 Mouse for Apple Devices |
Most 64×64 RGB matrix panels run on 5V and can draw substantial current at high brightness, especially on full-white scenes. Choose a 5V supply sized for worst-case load with headroom, use short thick power leads, and keep the controller and panel grounds connected.
Flicker and noise are commonly caused by incorrect scan-rate configuration, weak grounding, long ribbon cables, or unstable 5V power. Double-check the scan mode and pin mapping, reduce cable length, and improve power stability and cable routing.
Yes—chaining works when the controller supports the combined resolution and the panels’ scan mode. Expect higher total power needs, tighter alignment for clean seams, and software configuration for the final width/height and panel order.











Leave a comment