24-Inch Manual Tile Cutter for Clean, Accurate Cuts on Ceramic and Porcelain
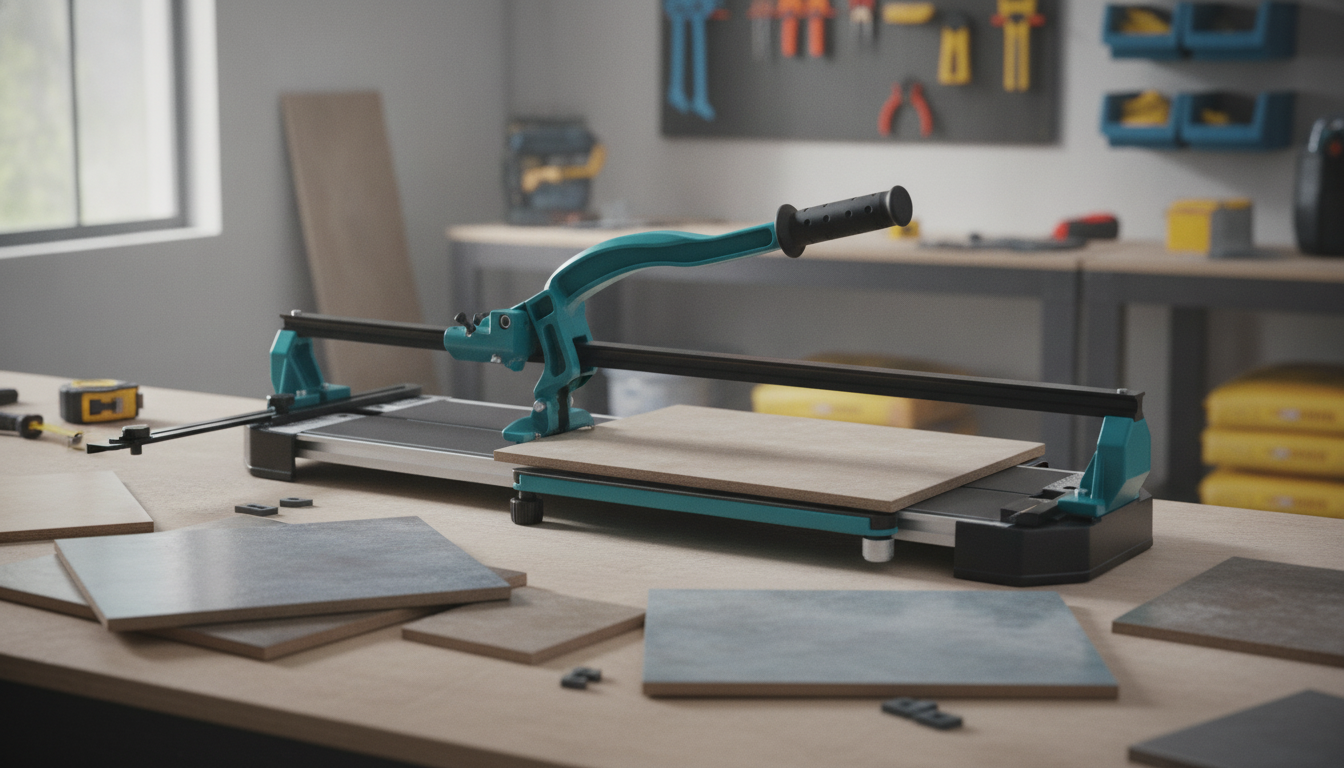
A reliable manual tile cutter can speed up tile work while keeping edges crisp and consistent. A 24-inch manual tile cutter is a practical choice for common tile layouts, letting you score and snap straight lines quickly without the water setup of a saw. Below are the use cases it’s best for, the parts that influence cut quality, and the setup and technique details that help reduce chips and wasted tiles.
What a 24-inch manual tile cutter is designed to handle
A 24-inch manual cutter is built for straight cuts on typical wall and floor tiles up to the tool’s rated length. It shines when you’re making repeated cuts for rows, borders, and end pieces where speed and consistency matter.
- Best suited for straight cuts on common wall and floor tile sizes up to the cutter’s rated length.
- Ideal for ceramic and many porcelain tiles when the scoring wheel is sharp and pressure is consistent.
- Useful for repetitive cuts where speed and consistency matter more than complex shapes.
- Not intended for curves, notches, L-cuts, or holes (those typically require a wet saw, grinder, or hole saw).
Key parts that affect cut quality
Even with good technique, the cutter’s main components determine how cleanly the tile scores and how predictably it snaps.
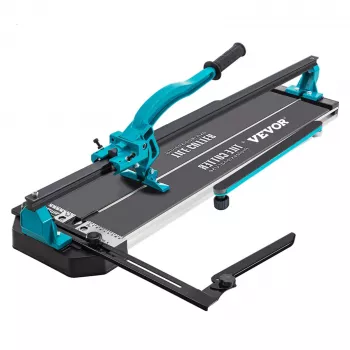
- Scoring wheel: The edge condition and wheel material directly influence chipping and the ease of snapping.
- Guide rails and base: Stiffness and alignment help keep the score line straight over longer tiles.
- Fence and angle guides: Improve repeatability for identical cuts and common angles.
- Breaking foot and pressure mechanism: Steady, centered force helps the tile snap on the scored line rather than wandering.
Setup checks before the first cut
A few minutes of setup prevents most “mystery” breaks—especially on porcelain, where small alignment issues show up fast.
- Place the cutter on a stable, level surface to prevent flex that can distort the snap.
- Confirm the fence/guide is square to the scoring path using a carpenter’s square.
- Clean the base and rails so grit does not lift the tile or cause the wheel to hop.
- Mark cut lines clearly with a pencil or fine marker; use a square for straight lines.
- Test on an inexpensive spare tile to confirm scoring pressure and snapping behavior.
For industry references on tile installation standards and best practices, the Tile Council of North America (TCNA) is a helpful resource. If you switch to dust-producing tools (like grinders), review OSHA’s silica guidance for construction for dust control considerations.
Technique for cleaner scoring and snapping
Manual cutters reward consistency. The goal is a single, continuous score and a controlled snap that stays centered on the line.
- Score once, continuously: Multiple passes often increase edge chipping and weaken accuracy.
- Use firm, even pressure: Enough to create a consistent score sound/feel without crushing the glaze.
- Keep the tile tight to the fence: Full support on the base prevents rocking as you score.
- Center the breaking foot: Apply a smooth, controlled snap so the fracture starts on the score.
- For porcelain: Slow down, ensure a sharp wheel, and verify the tile is well supported to reduce break wandering.
After snapping, lightly dressing the cut edge (especially on visible edges) can make the result look more “factory clean,” even when the snap itself is accurate.
Common problems and quick fixes
Most cut issues come from three sources: wheel condition, alignment, and inconsistent force. These quick adjustments often solve the problem without changing tools.
- Chipping along the cut: Reduce excess scoring pressure, replace a worn wheel, and ensure the tile is not vibrating.
- Tile won’t snap cleanly: Confirm the score is continuous end-to-end; increase snapping force gradually and keep it centered.
- Break runs off the line: Check fence squareness, keep the tile firmly against the guide, and avoid twisting during snap.
- Ragged edges: Lightly dress the edge with a rubbing stone or diamond hand pad after cutting.
- Inconsistent repeat cuts: Lock the fence, measure from the same reference edge, and avoid moving the cutter between cuts.
When a manual cutter is the right tool (and when it isn’t)
Manual cutter vs. wet saw vs. angle grinder (quick comparison)
| Tool |
Best for |
Limitations |
Typical finish |
| 24-inch manual tile cutter |
Fast straight cuts on ceramic and many porcelain tiles |
No curves/notches; can struggle with very hard/thick porcelain |
Clean snap edge; may need light edge dressing |
| Wet tile saw |
Straight cuts and many specialty cuts with the right blade |
Messier setup; water management; slower for repetitive short cuts |
Smooth, saw-cut edge; often cleaner on dense porcelain |
| Angle grinder with diamond blade |
Notches, L-cuts, trimming, and some curves |
More dust and noise; higher chip risk without practice |
Varies by technique; usually needs edge finishing |
Care and maintenance that keeps cuts consistent
24-Inch Manual Tile Cutter – Precision Cutting for Ceramic & Porcelain Tiles
Optional jobsite add-on
4L Mini Portable Fridge with Cooling & Warming Function
FAQ
Can a manual tile cutter cut porcelain tile cleanly?
Yes for many porcelain tiles, especially when the scoring wheel is sharp and the tile is fully supported. For very dense or thicker porcelain, a wet saw can be more consistent.
How much pressure should be used when scoring a tile?
Use firm, consistent pressure to make one continuous score line from end to end. Too little pressure may not fracture properly, while too much can chip the glaze and make the snap less predictable.
Why does the tile snap off the scored line?
Common causes include a fence that isn’t square, a score that isn’t continuous, tile movement during scoring/snapping, or uneven snapping force that isn’t centered over the score.
Recommended for you









Leave a comment